Are you looking for ways to achieve a professional-looking faux wood finish? Look no further than Retique It liquid wood, the revolutionary product that will allow you to create a realistic faux wood finish like a pro. With just a few expert tips and techniques, you can transform any surface into a stunning display of natural beauty. From understanding the power of Retique It to mastering the application technique and adding those finishing touches, this article will guide you through every step of the process. Plus, we’ll share essential tips on maintenance and longevity, ensuring your faux wood finish remains pristine for years to come. So, what are you waiting for? Get ready to bring the warmth and elegance of wood to any surface – it’s time to unleash your creativity and transform your living space into a haven of natural beauty.
Table of Contents
What is Retique It Liquid Wood
Before we jump into the details of choosing the right surface and prep work, it’s important to understand the power of Retique It liquid wood and why it is the ultimate game-changer for creating a realistic faux wood finish.
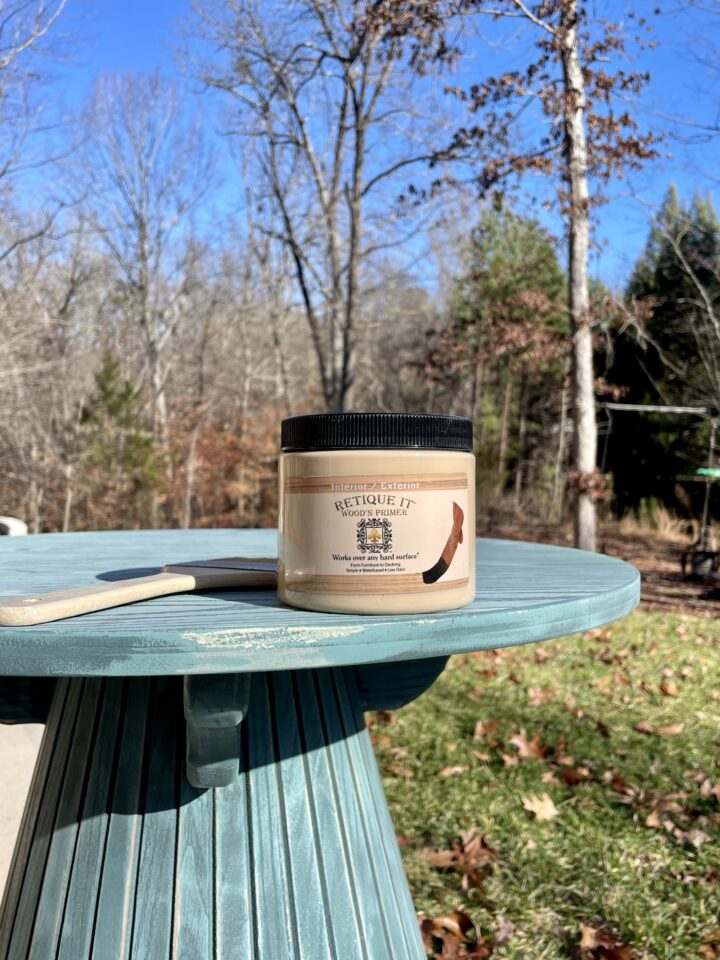
Retique It liquid wood products contain over 60% recycled wood fibers. Its’ patented new technology allows you to transform any surface, be it furniture, kitchen cabinets, or even garage doors, into a stunning replica of natural wood.
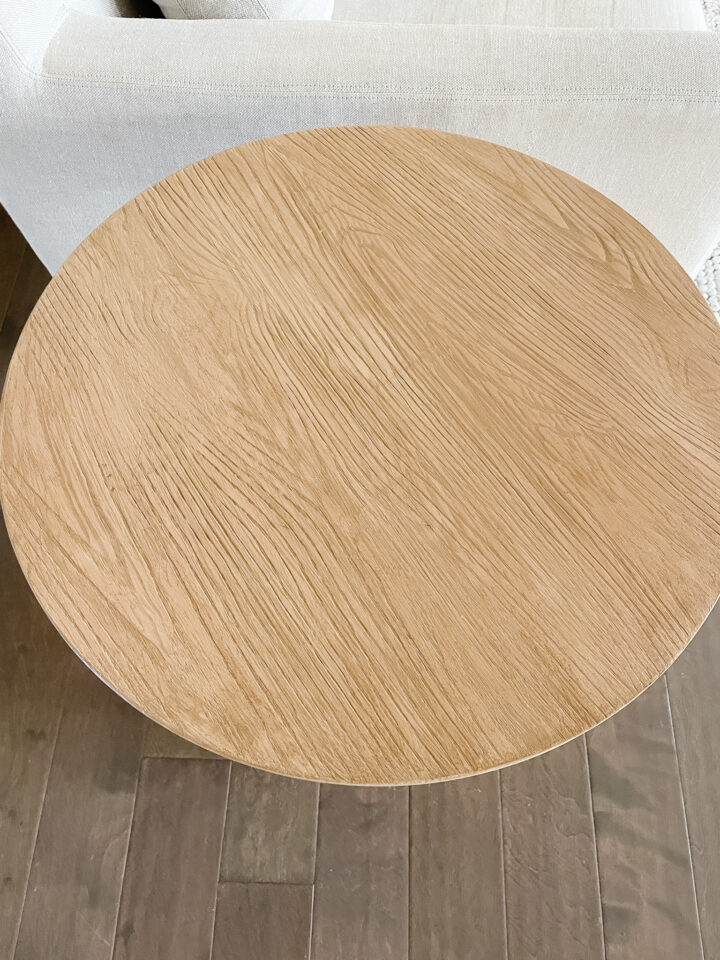
What sets Retique It liquid wood apart is its realistic wood grain texture. Unlike other faux wood finishes, which may look flat and artificial, Retique It liquid wood creates a three-dimensional, textured surface that mimics the intricate patterns found in real wood. This attention to detail ensures that your finished project will not only look stunning but also feel authentic to the touch.
Furthermore, Retique It liquid wood offers exceptional durability. Once applied, it forms a strong bond with the surface, providing long-lasting protection against everyday wear and tear. This means your faux wood finish will not only maintain its beauty but also stand the test of time, ensuring your investment is worthwhile.
Whether you’re a seasoned DIY enthusiast or a beginner looking to explore your creative side, Retique It liquid wood is a game-changer that opens up a world of possibilities. Its ease of use and versatility make it suitable for any skill level, allowing you to achieve professional-looking results without the need for extensive woodworking experience, and the best part is that the kit includes everything that you will need for a project.
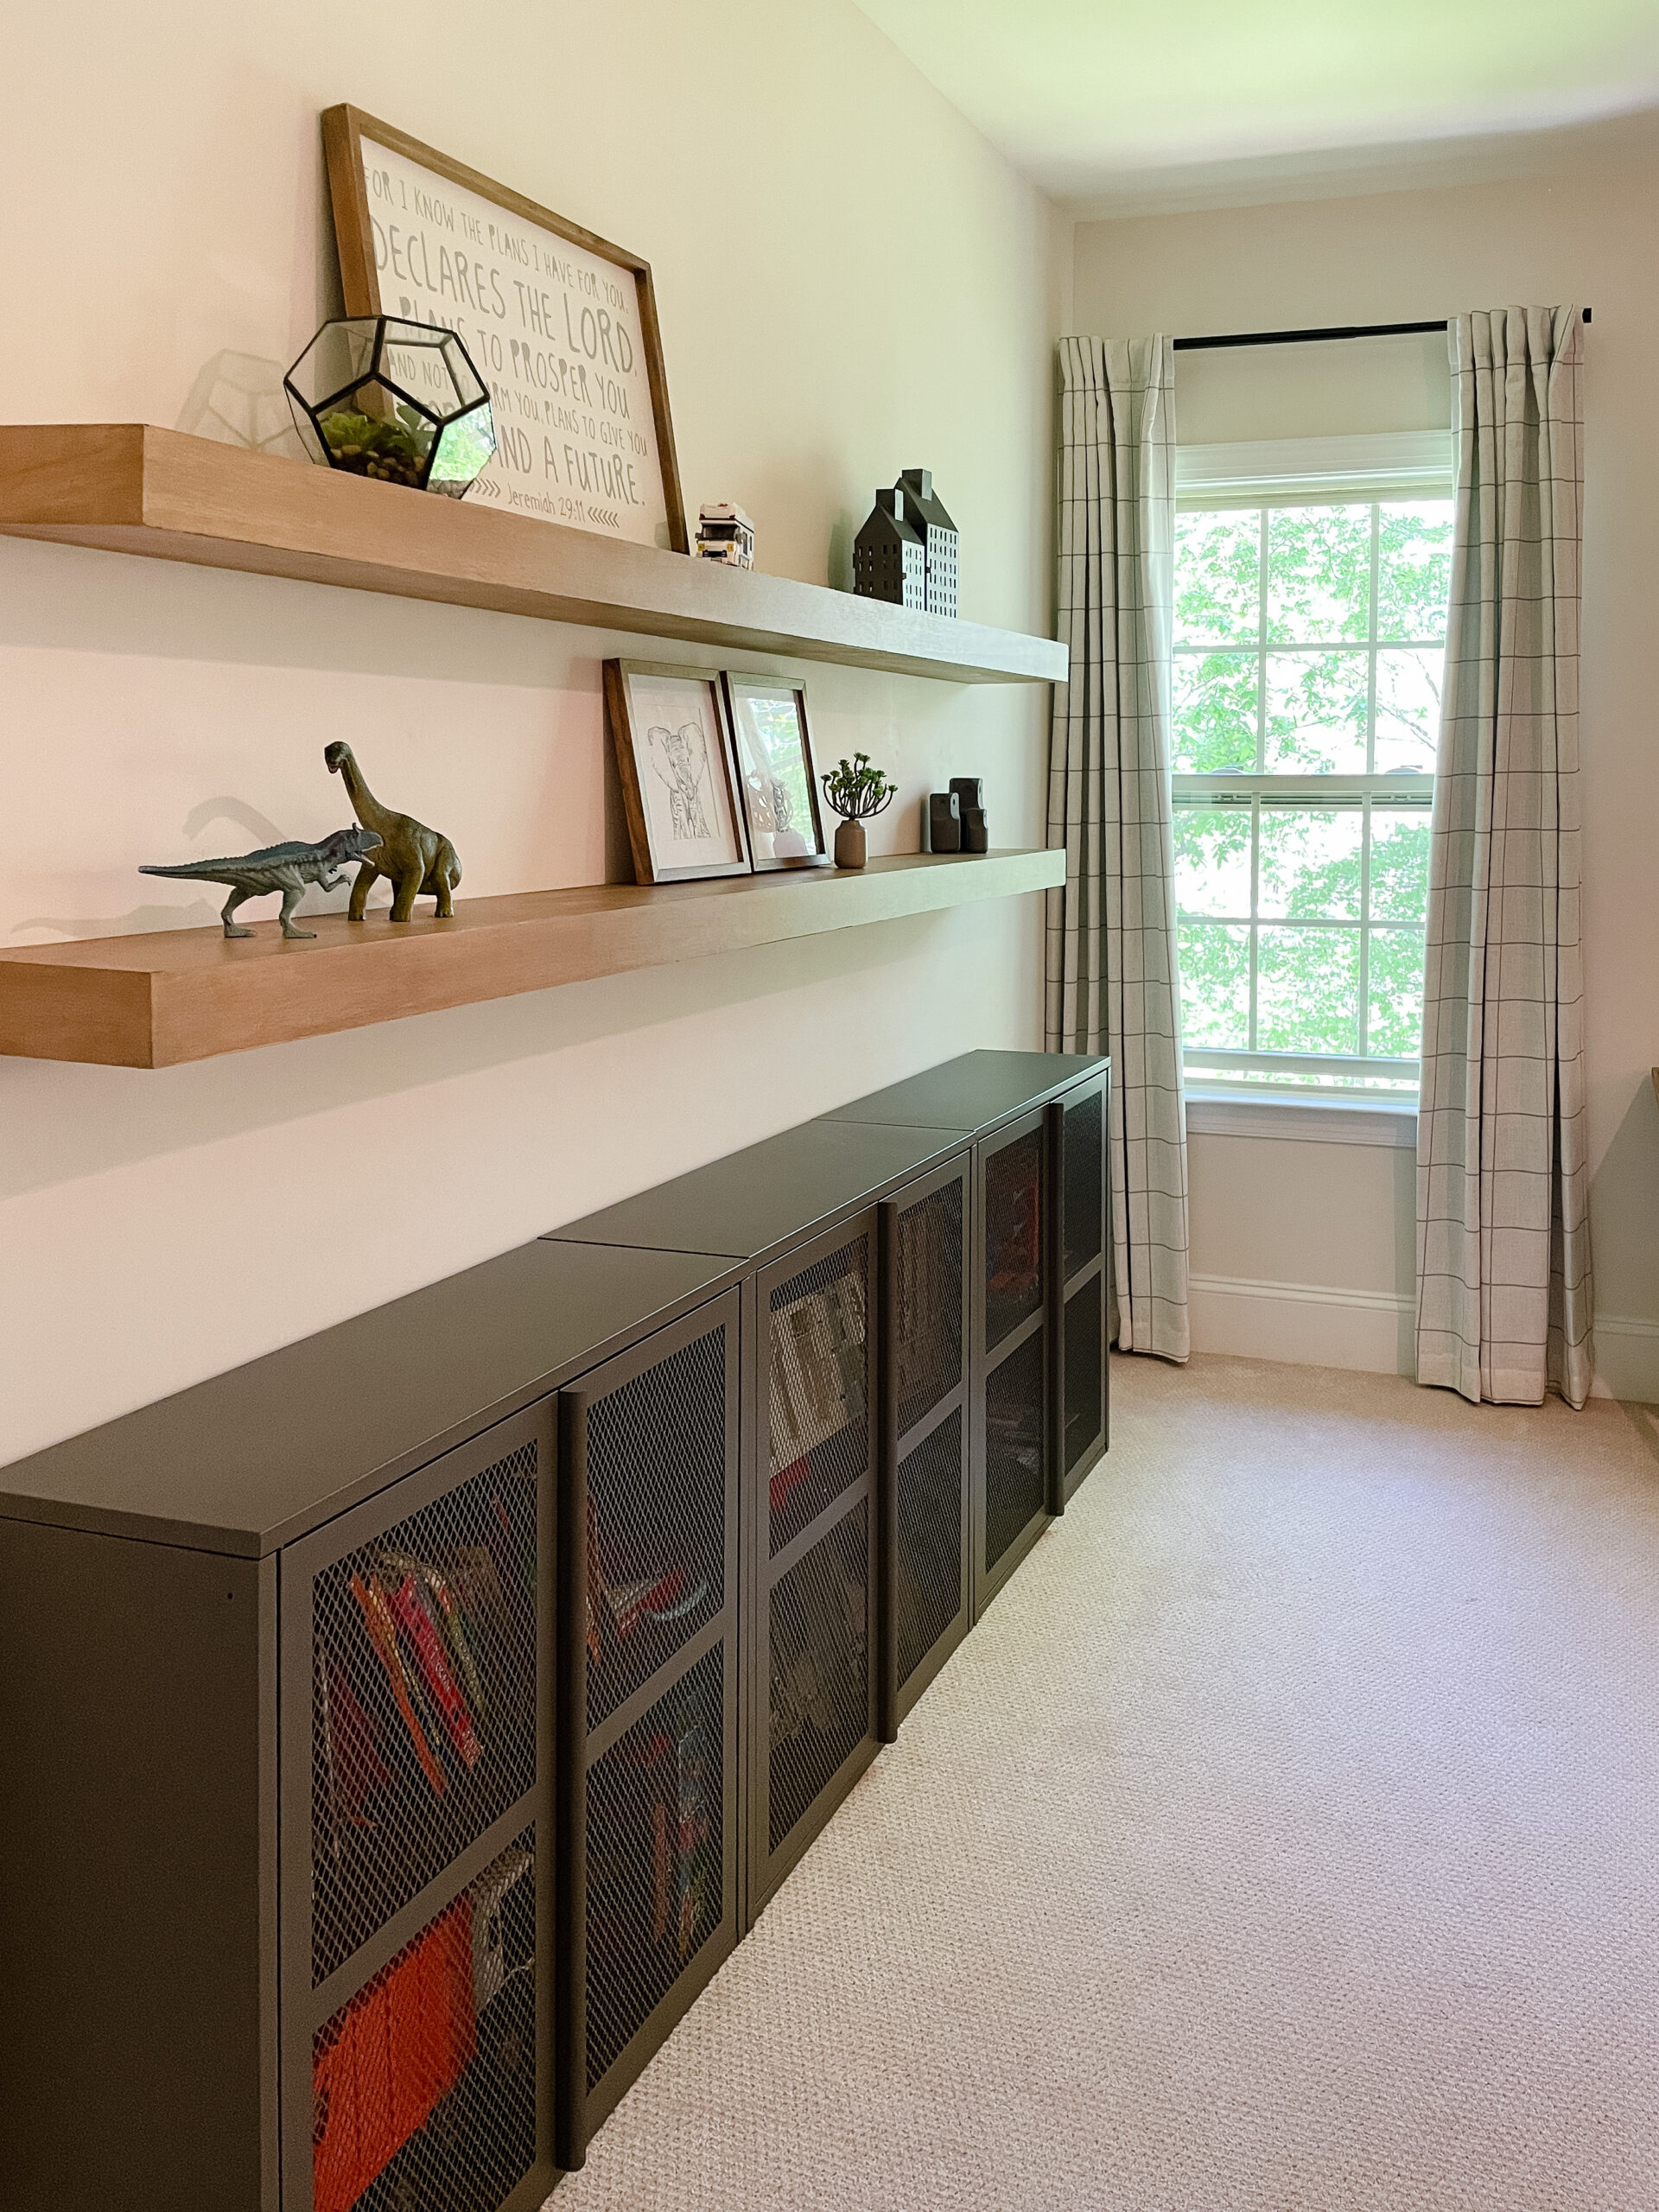
Step-by-step wood floating shelves DIY and mistakes to avoid
Choosing the Right Surface and Prep Work
Now that you understand the power of Retique It liquid wood, it’s time to dive into the important steps involved in choosing the right surface and prep work. By following these essential guidelines, you’ll be on your way to creating a faux wood finish that will truly revolutionize your home decor.
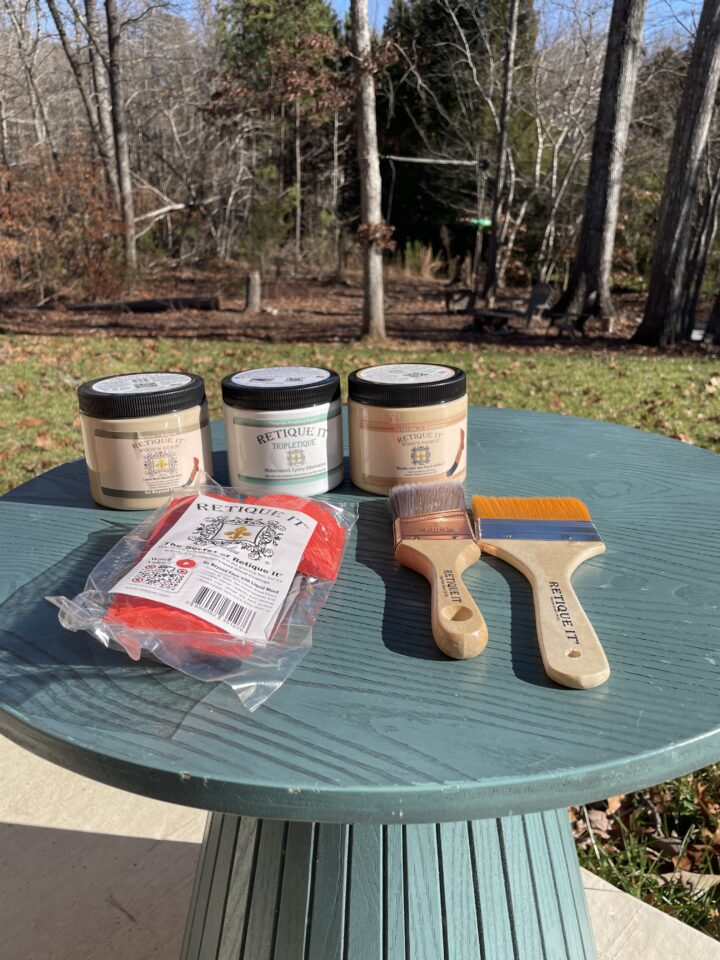
Supplies you will need
Water-Based Gel Stains by Retique It
DEWALT Random Orbit Sander (optional)
Before you begin your project, it’s crucial to select the right surface for applying the liquid wood. While Retique It can adhere to a variety of materials like wood and metal, it’s important to consider the texture and condition of the surface. Smooth surfaces with minimal imperfections yield the best results, so take the time to sand down rough patches and fill any cracks or holes with an appropriate filler.
Sanding, however, is optional and not required.
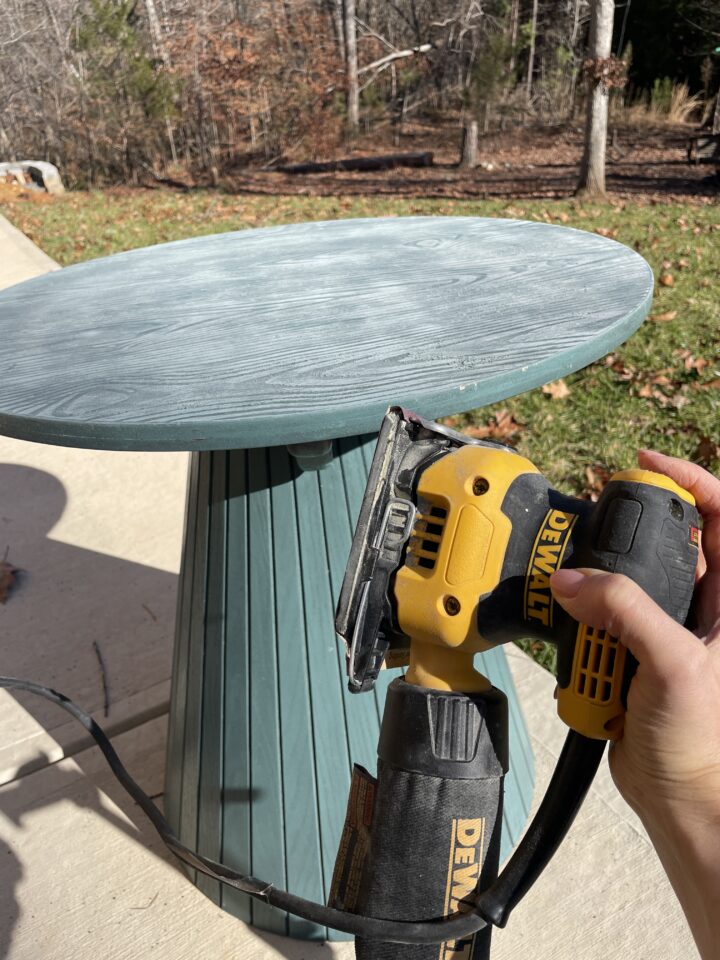
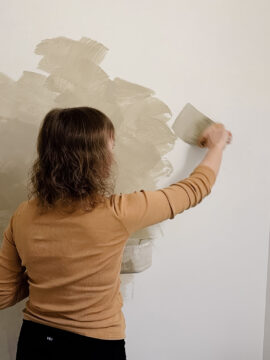
Additionally, it’s essential to prepare the surface properly to ensure long-lasting results. Start by cleaning the surface thoroughly, removing any dirt, dust, grease, or old finishes. Wipe the surface with denatured alcohol and water or mild detergent, degreaser, and a soft cloth to ensure a clean canvas for your faux wood finish.
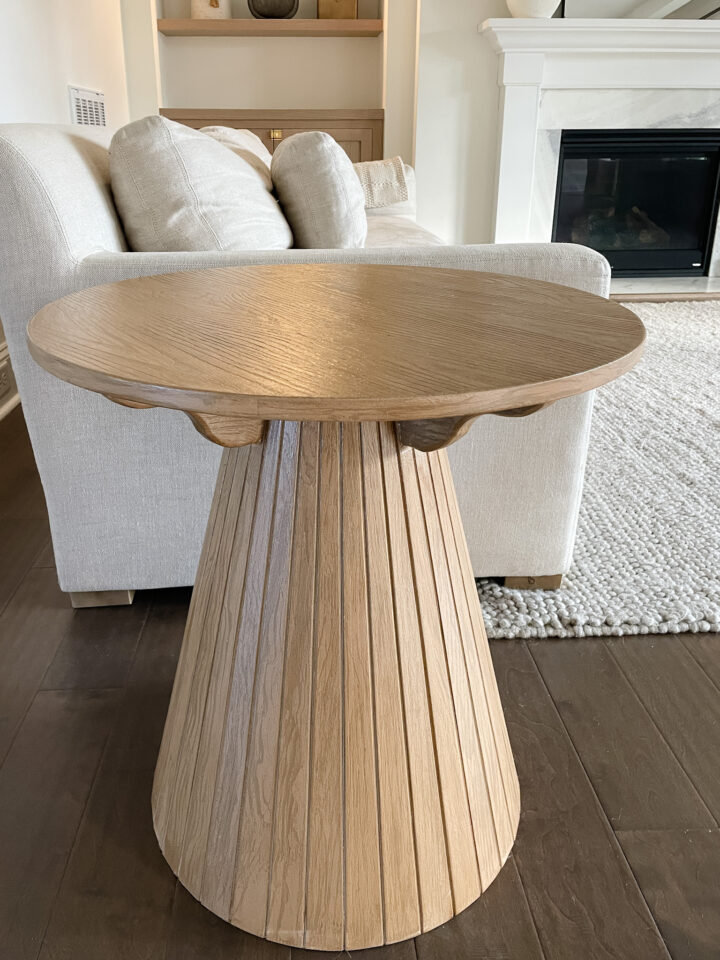
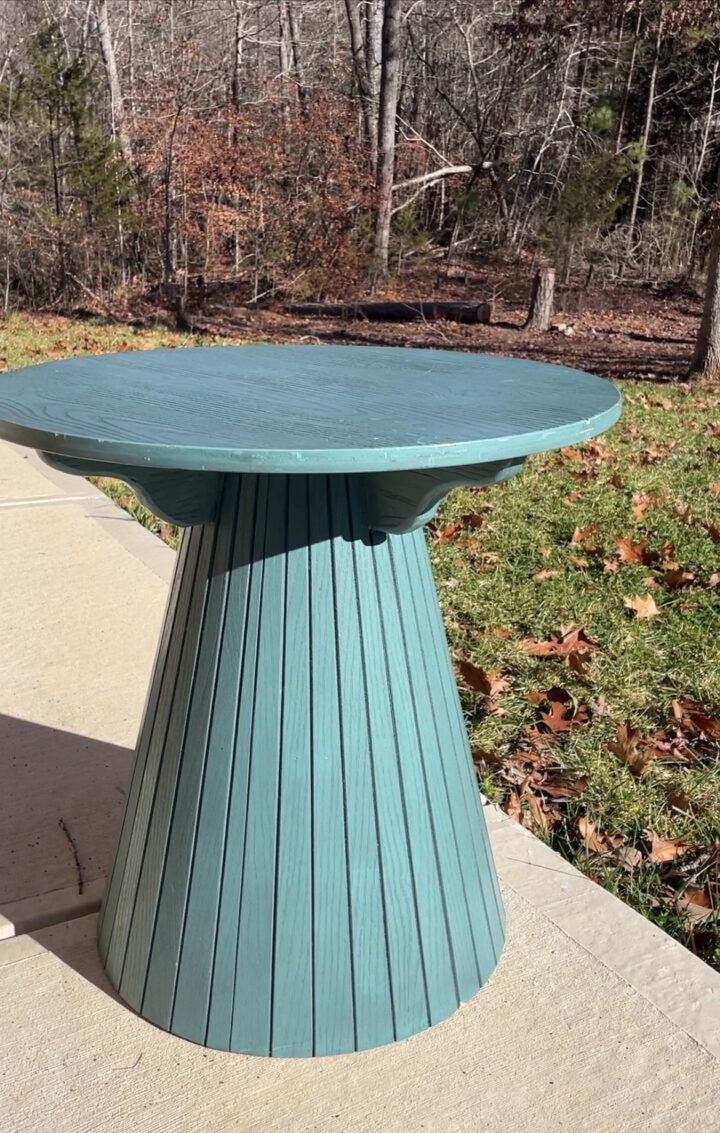
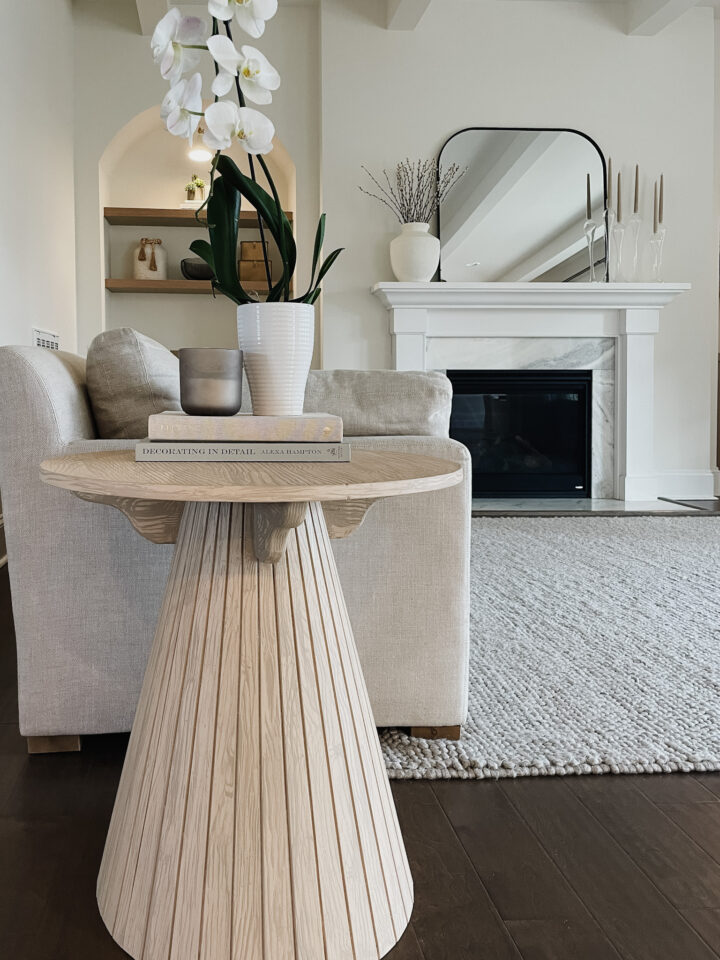
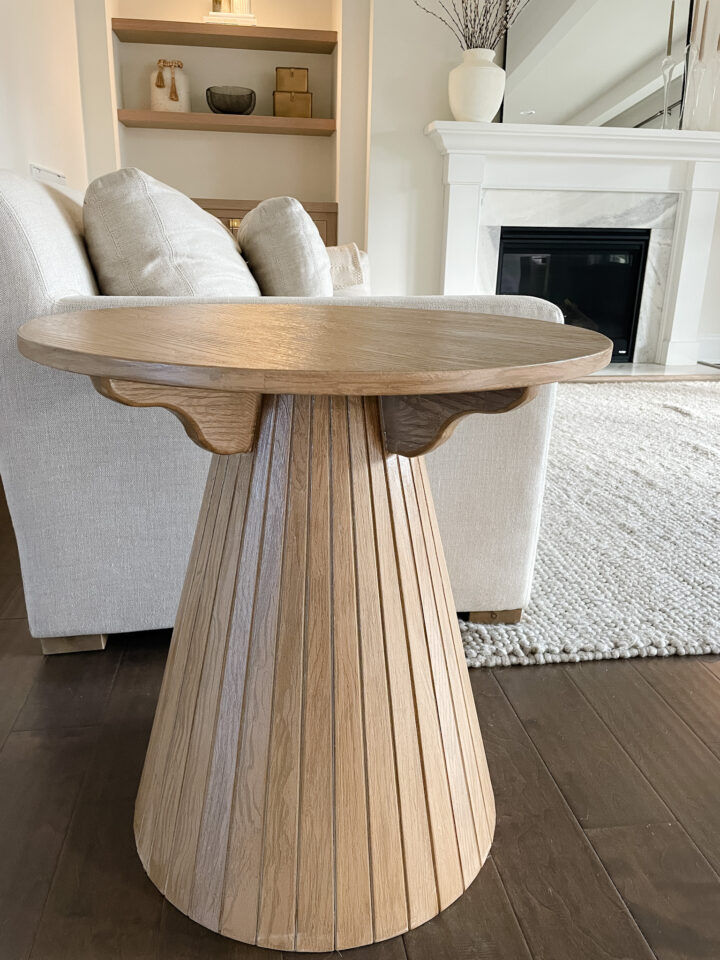
I found this painted coffee table in the clearance section at Home Goods for $45 and immediately knew that it had potential.
Mastering the Technique: Applying Retique It Liquid Wood
Now that you have chosen the right surface and prepared it properly, you’re ready to move on to the exciting part – mastering the technique of applying Retique It liquid wood. By following the instructions in the next section, you’ll learn how to achieve a realistic faux wood finish that will leave your friends and family in awe.
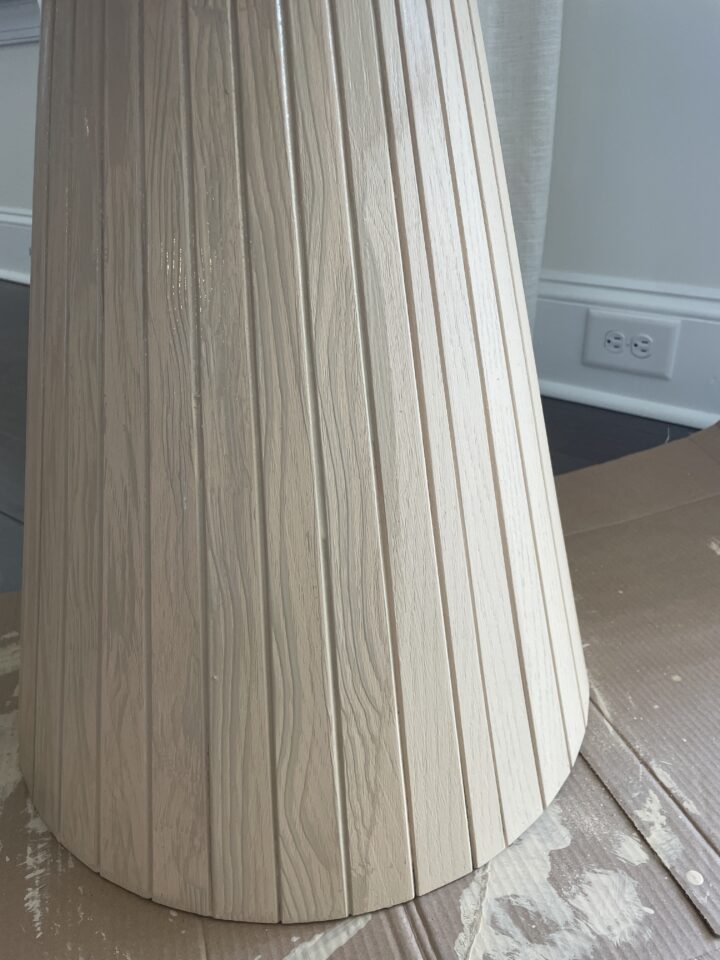
The Base Coat
You will start by applying the Wood’n Primer to the entire surface. Use a brush that’s included in the kit to apply a thin, even coat of the liquid wood onto the surface, working in the direction of the wood grain for a more authentic look.
Once the first coat is dry, usually within a few hours, inspect the surface for any imperfections or areas requiring additional coverage. If needed, apply a second coat using the same technique as before. Remember to work in the direction of the wood grain to maintain consistency and realism.

It’s important to remain patient throughout the application process and take your time. Rushing can lead to mistakes and result in an unfinished look. Take breaks if needed and step back occasionally to evaluate your progress.
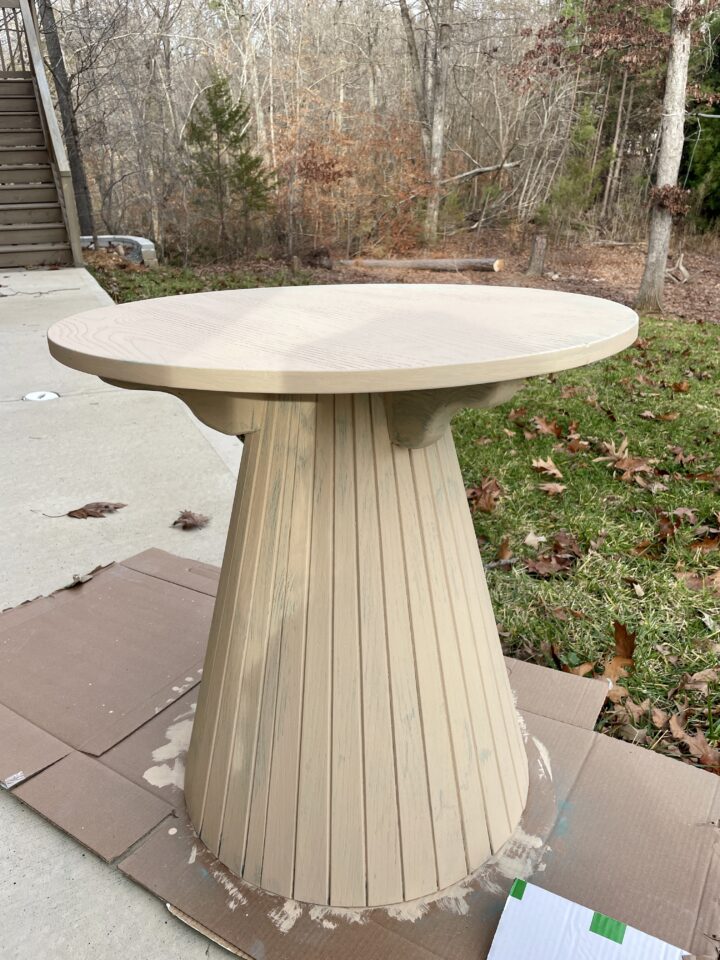
Now that the base coat is dry, you’re ready to move on to the next step in achieving a truly realistic faux wood finish. In the following section, we’ll explore the art of staining and adding finishing touches to enhance the authenticity of your project.
Creating Faux Wood Finish: Grain Wood’n Stain
Now that you have mastered the technique of applying Retique It liquid wood, you’re ready to move on to the next step in achieving a truly realistic faux wood finish.
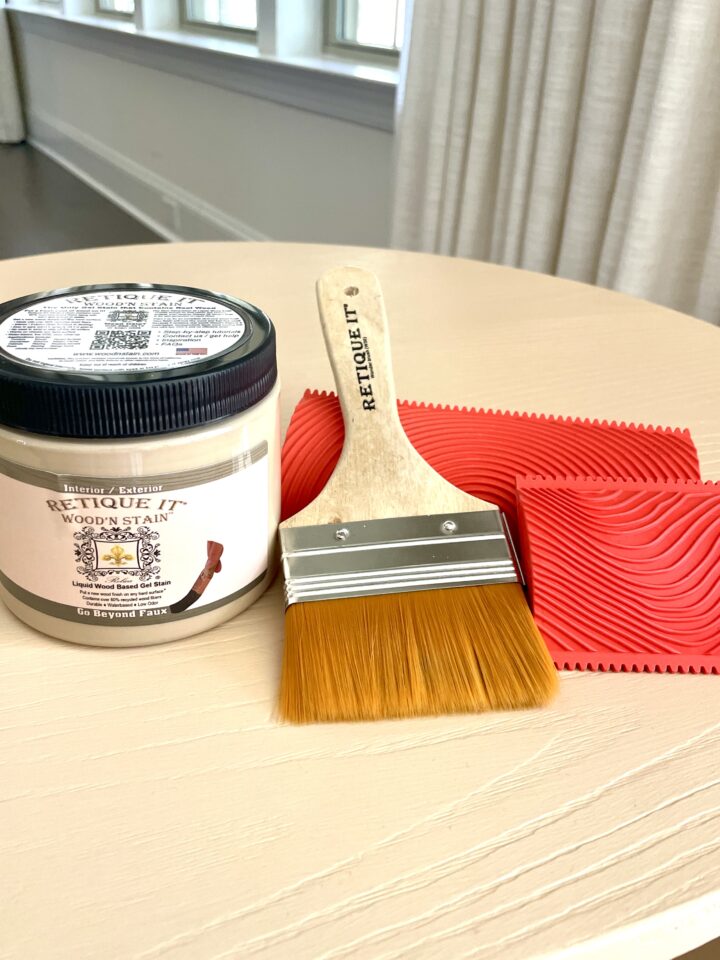
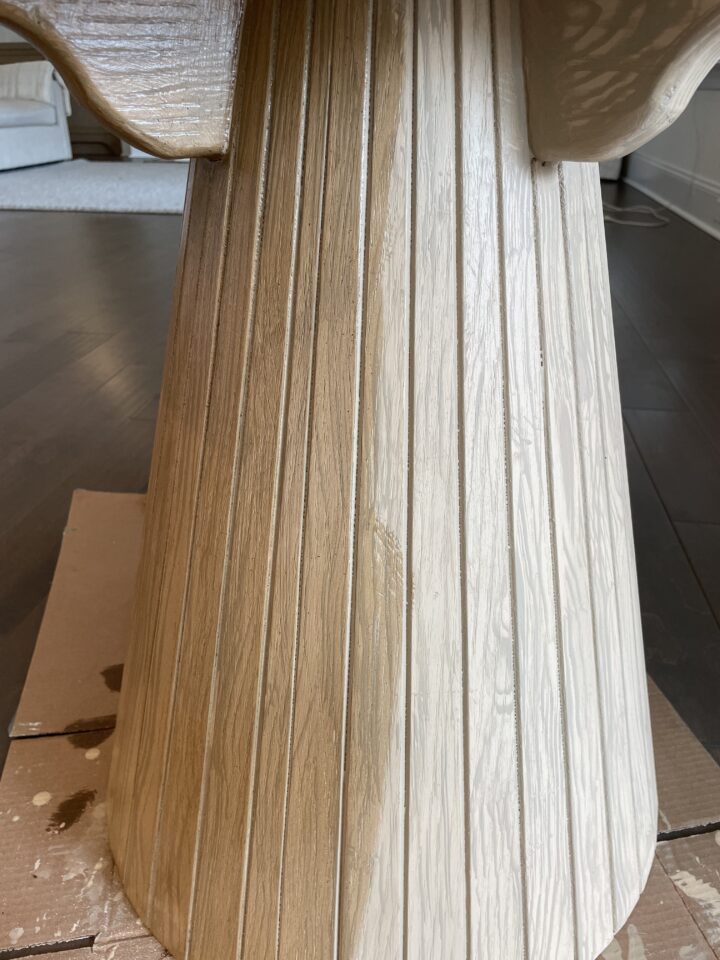
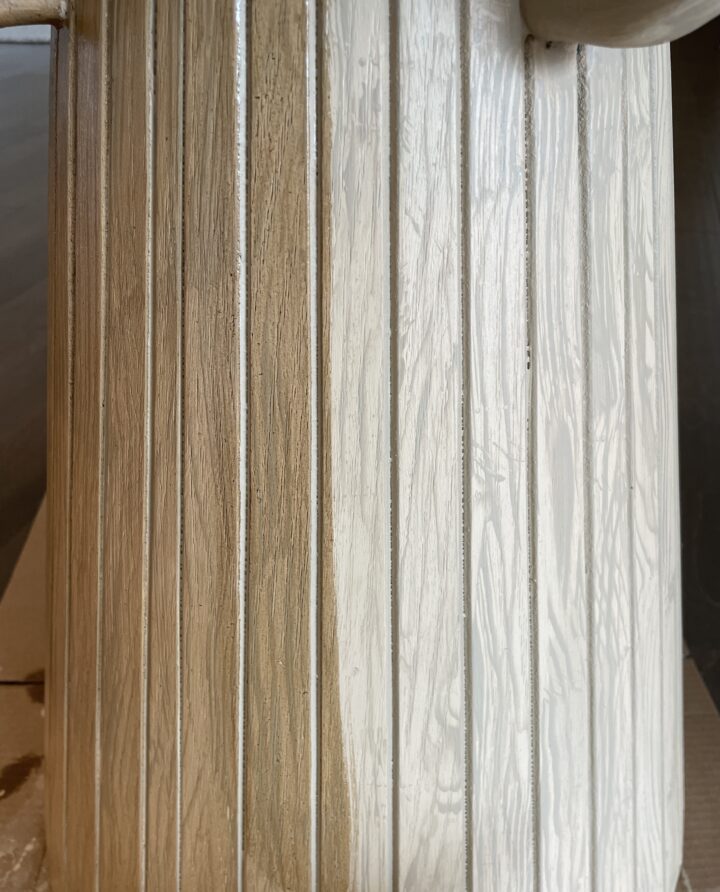
During the staining process, you will use the graining tool to create the faux wood finish. When selecting a stain, consider the type of wood you are trying to imitate.
Before applying the stain, make sure the Retique It liquid wood has fully dried and that it doesn’t have any imperfections, such as bubbles or rough spots, have been sanded down. This will ensure an even application and a smooth, polished look. Use a high-quality brush (included in the kit) to apply the stain in long, even strokes.
Work in small sections and use the graining tool right after applying the stain to create a faux wood finish. Simply drag the tool or brush lightly across the surface, following the natural grain direction. This technique will add subtle texture and depth to your project, making it almost indistinguishable from real wood.
Apply Wood’n Stain
Depending on the color of the stain you desire, apply 1-3 Wood’n Stain using long even strokes. Adding more coats will give you a darker finish.
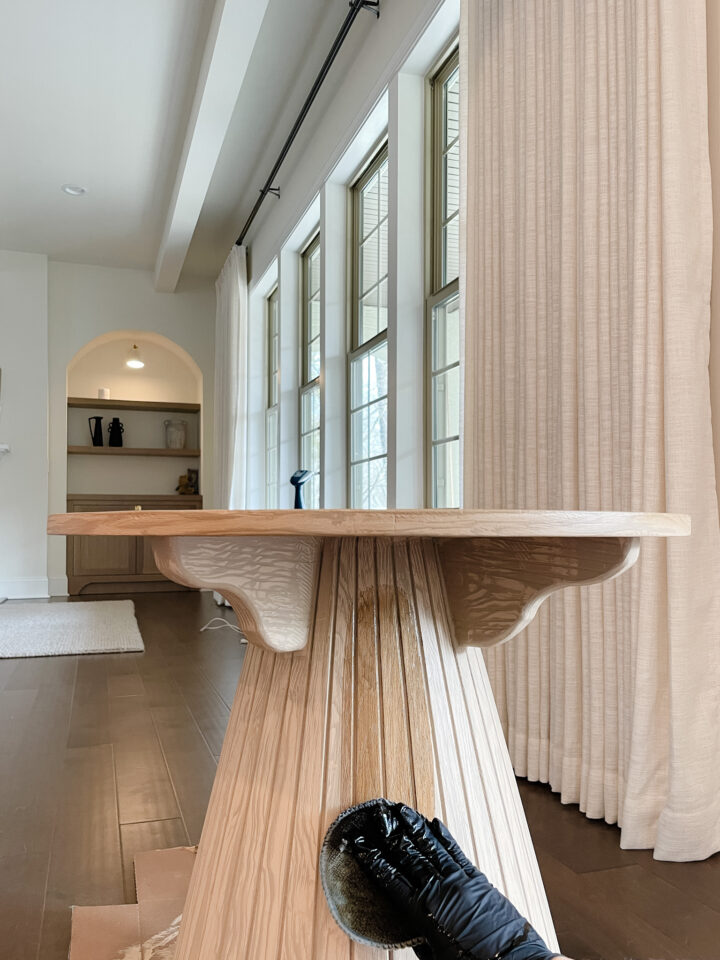
Allow each coat 2 hours to dry or use a blow dryer on high heat to speed up the dry time. Remember to rinse your brush immediately after each use.
Do you need a Sealer?
Even though both Wood’n Stain and Wood’n Primer have sealer already in them, if your kit has a topcoat in it, then your project requires extra protection.
Apply 2 or more thin coats with the flat brush, and allow each coat 2 hours to dry. Make your strokes long and even.
With the staining and finishing touches complete, your faux wood finish is now beautifully realistic and ready for its final step: maintenance and longevity. By properly caring for your creation, you can ensure its beauty lasts for years to come.,
Maintenance and Longevity: Caring for Your Faux Wood Finish
With the staining and finishing touches complete, your faux wood finish is now beautifully realistic and ready for its final step: maintenance and longevity. By properly caring for your creation, you can ensure its beauty lasts for years to come.
In addition to regular cleaning, it’s important to protect your faux wood finish from excessive heat, moisture, and direct sunlight. Place coasters or trivets under hot dishes and use placemats or tablecloths to prevent scratches and stains. If you have furniture with faux wood finishes, consider using felt pads on the bottom of items to avoid scratches and scuffs when moving them.
Should you encounter any scratches or chips in your faux wood finish, don’t fret. There are touch-up kits available that allow you to repair minor damage. Simply follow the instructions provided with the touch-up kit, and your faux wood finish will be looking as good as new.
By following these simple maintenance steps, you can ensure the longevity of your faux wood finish. With proper care, your creation will continue to impress guests and retain its realistic appearance for years to come.
Easy DIY Vase Upcycling: Textured Paint Look with Baking Soda
Conclusion
In conclusion, you now have the knowledge and expertise to create a stunning faux wood finish with Retique It liquid wood. Understanding the power of this innovative product, choosing the right surface, and mastering the technique of application are key steps in achieving a realistic result. By enhancing realism through staining and finishing touches, your faux wood finish will exude warmth and elegance in any room.
Now, armed with these expert tips and techniques, it’s time to transform your home and revolutionize your decor. Don’t delay any longer – start your DIY project today and bring the timeless charm of wood to any surface. As Ralph Waldo Emerson once said, “Do not go where the path may lead, go instead where there is no path and leave a trail.” So go forth, leave your mark, and let the beauty of faux wood speak for itself.
Discover more from Your Designer BFF
Subscribe to get the latest posts sent to your email.